Thanks to Microsoft and its UWP application, Win 10 IoT device can share the same framework of normal Win 10 application.
In this post, we’ll build a simple short blink application for Win 10 IoT platform. It assums that you’ve already have some knowledgements about GPIO.
Connection
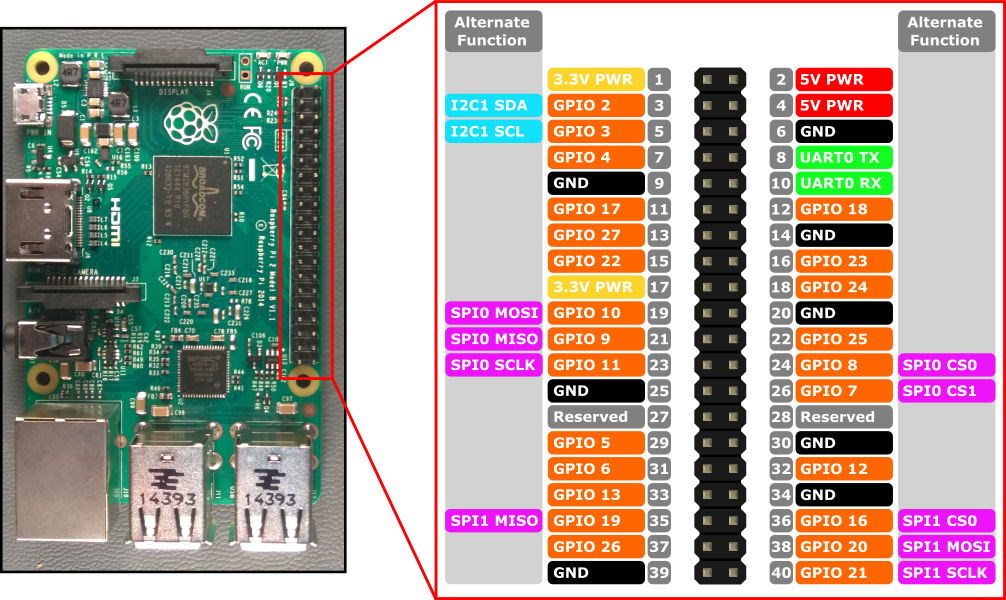
The Raspberry Pi GPIO pins are defined in Win 10 IoT as following:

There is also a “Power-on Pull” state for each pin. “PullDown” means the pin has no tension, meanwhile “PullUp” means the pin has a high tension. Please check PIN Mapping for some more details.
Here we choose PIN 11 and PIN 9(Ground) to use. The circuit is like this:

The green wire is connected to PIN 11, the brown to PIN 9.
Code
- Use
GpioController gpio = GpioController.GetDefault();to get GPIO controller. - Use
GpioPin pin = gpio.OpenPin(17)to open a gpio port.PIN 11isGPIO 17in Win 10 IoT. - Write HIGH to this port
pin.Write(GpioPinValue.High);. - Set to output mode
pin.SetDriveMode(GpioPinDriveMode.Output);. - Close port(Here we use
usingto make it close automately).
1 | public sealed partial class MainPage : Page |
Conclusion
This video shows you the result:
